Building a DIY Home Server with FreeNAS
February 28, 2020 ∙
22 min read ∙
Last modified: February 14, 2025 ∙
freenas nas storage homelab plex zfs
Keep reading! I’ve documented several upgrades to my DIY
NAS at the bottom of this post.
After you’re doing reading this, hop over to my latest update on my homelab server / NAS.
This post is almost a year over due. I think it might still be relevant for people looking to start a NAS project or upgrade from a consumer-grade NAS like QNAP or Synology.
This is by no means a definitive guide on how to build a reliable network attached storage server. I made choices relevant to my use case, yours might be different.
For you eager people, there’s a full part list at the bottom of this post.
Some history
Up until May 2019 I stored my photos, old documents and other things on a single 3TB Western Digital Green drive in my Hackintosh.
Backups were already part of my setup by using Backblaze. This was great because it allowed me to use unlimited backup data for a fixed price.
But I was running into some limitations of this setup.
Filesize and volume of digital media
Every new phone has a better camera, and I like to shoot in the best quality available. With my current Oneplus 6 that means 3456×4608px per photo (roughly 4-8MB per photo). Not to mention 4k video at 60fps…
Having kids also means taking a lot more photos and videos.
Before I would automatically backup media on my phone to Dropbox, because that was convenient. But with a 5GB limit I would often be reminded to either upgrade or clean up some files, which means manually moving older photos and videso from Dropbox to my trusty 3TB hard drive.
Restoring backups sucks
I have not kept track on how many disks failed on me, but is has happened on a few occassions. Backblaze to the rescue! However, restoring 1TB+ of data is not a fun activity.
The reality is, disks fail. Especially if you buy the cheapest ones available and don’t take care of them.
Streaming video
I’ve always been a fan of Plex. With a collection of over 200 DVDs, there’s plenty to watch, but physical drives are disappearing all around. Plex is a great solution, but it works best if you media are available when you need them. Having to be at home and turn on your computer to watch something is a nuisance.
The plan
So, after much consideration, I decided I needed a NAS. Many of my friends have one and they seem to be happy with them. Of course, I could not run to a local electronics store and buy just any storage server. First I had to write down what I wanted out of this system.
- Store 1TB+ of data safely
- Redundancy to cope with disk failure
- Extendable in the future
- Write/Read performance should be okay, but not a priority (I’m not editing 8k video on this thing)
- Problaby needs a UPS for safe shutdown in the case of power loss
- Share data/disks over Samba/AFS/NFS, Time Machine support would be nice
- It needs to be always-on
- Energy efficiency is important
- It needs to be silent, will probably sit in the study
- Needs to run Nextcloud and Plex
- Needs a companion mobile app to auto-backup photos and videos
- Needs sufficient memory
- Needs sufficient CPU power for transcoding 1, maybe 2 simultanious streams
- Room to grow to run more apps or VMs
- Needs to be future proof
- More storage
- More memory
- Be able to use this a desktop computer if this NAS thing really sucks
What NAS solution fits best
What I had to figure out is what NAS solutions are available to me, and which one is most suitable for my usecase.
Consumer grade NAS systems like those from QNAP or Synology are quite popular. They do come with a few major drawbacks for me. They are not (or minimally) upgradeable. A simple Celeron CPU and 8GB of memory will probably not suffice. I’m also stuck with a custom operating system, something which I try to avoid like the plague.
At this point, my best option in this category was the Synology DS918+, retailing locally for €550. With room for four drives, it already felt limited. I want it to be expandable. The Intel Celeron J3455 (quad core @ 1.5Ghz) and 4GB RAM seemed especially limiting. Also the vendor lock-in is not very appealing.
Next I visited /r/DataHoarder, a nice corner of the internet where people come together to discuss hoarding data - and all the hardware needed to do that. Many here opt for used enterprise hardware from SuperMicro or Dell in 19" rack cases. The hardware can be very powerfull, but comes at a cost too. Space and noise are two considerations. This enterprise hardware is made for use in datacenters where noise is not much of an issue. Having to mod a case to be silent would be a major effort. Secondly, a 4u 19" server is quite bulky and not something you easily fit under your desk.
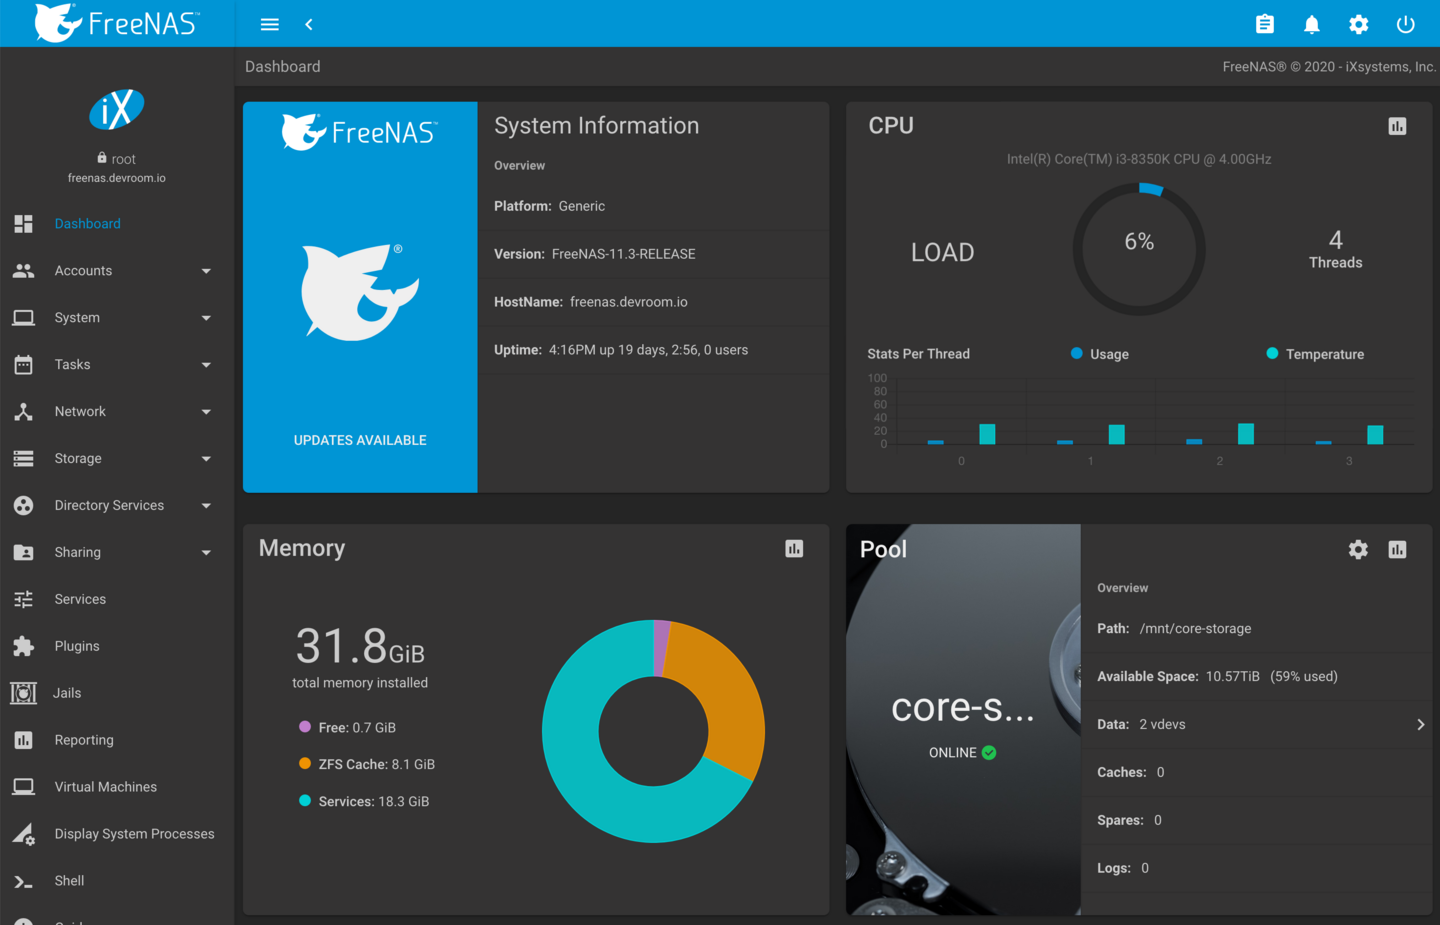
This left me to find the middle ground: consumer grade hardware, but with special, preferably open source, software. /r/DataHoarder quickly pointed me towards FreeNAS. _“Enterprise-Grade features, open source, BSD licensed” grabbed my attention. Based on FreeBSD, FreeNAS leans heavily on ZFS - which sounded really good to me.
At this point I setup a VirtualBox VM on my Mac with 4 “8GB Disks” to give FreeNAS a spin. The setup was rather easy (not how I remember installing FreeBSD 5.x years ago). I toyed around with ZFS, setting up a pool, removing / replacing / resilvering disks. It was awesome.
My mind was made up: I wanted a x86/amd64, FreeNAS compatible system with 8+ 3.5" drive bays in a small-ish form factor.
FreeNAS FUD
Here’s the deal with FreeNAS. It’s maintained by a company named iXsystems, who sell hardare and also offer a more professional version of FreeNAS called TrueNAS. The forums are filled with people who run NAS’es in professional settings.
If I were to setup a NAS for a company, yes, I would opt for the Pro/Enterprise SAS drives, Intel Xeon or AMD ThreadRipper CPUs and loads of ECC RAM.
However. I’m building a home NAS system with four users (this includes two pre-schoolers who can’t even read yet).
So, although many of the recommendations of helpful people on the internet are true, it does not necessarily mean you’re wrong if you do it differently.
Shopping time!
Time to go shopping! I always try to find the best value for money, so these choices were not always directly obvious.
Motherboard / CPU / RAM
When I built my NAS, Intel was still king. If I had to do a rebuild, I’d happily opt for some AMD gear, but alas, here I am. I was happy with the performance of my Intel i5-3570K and I looked for something comparable in a newer generation. The Intel i3 8-series is now quad core, and the i3-8350K goes up to 4Ghz and a maximum of 64GB DDR4 RAM.
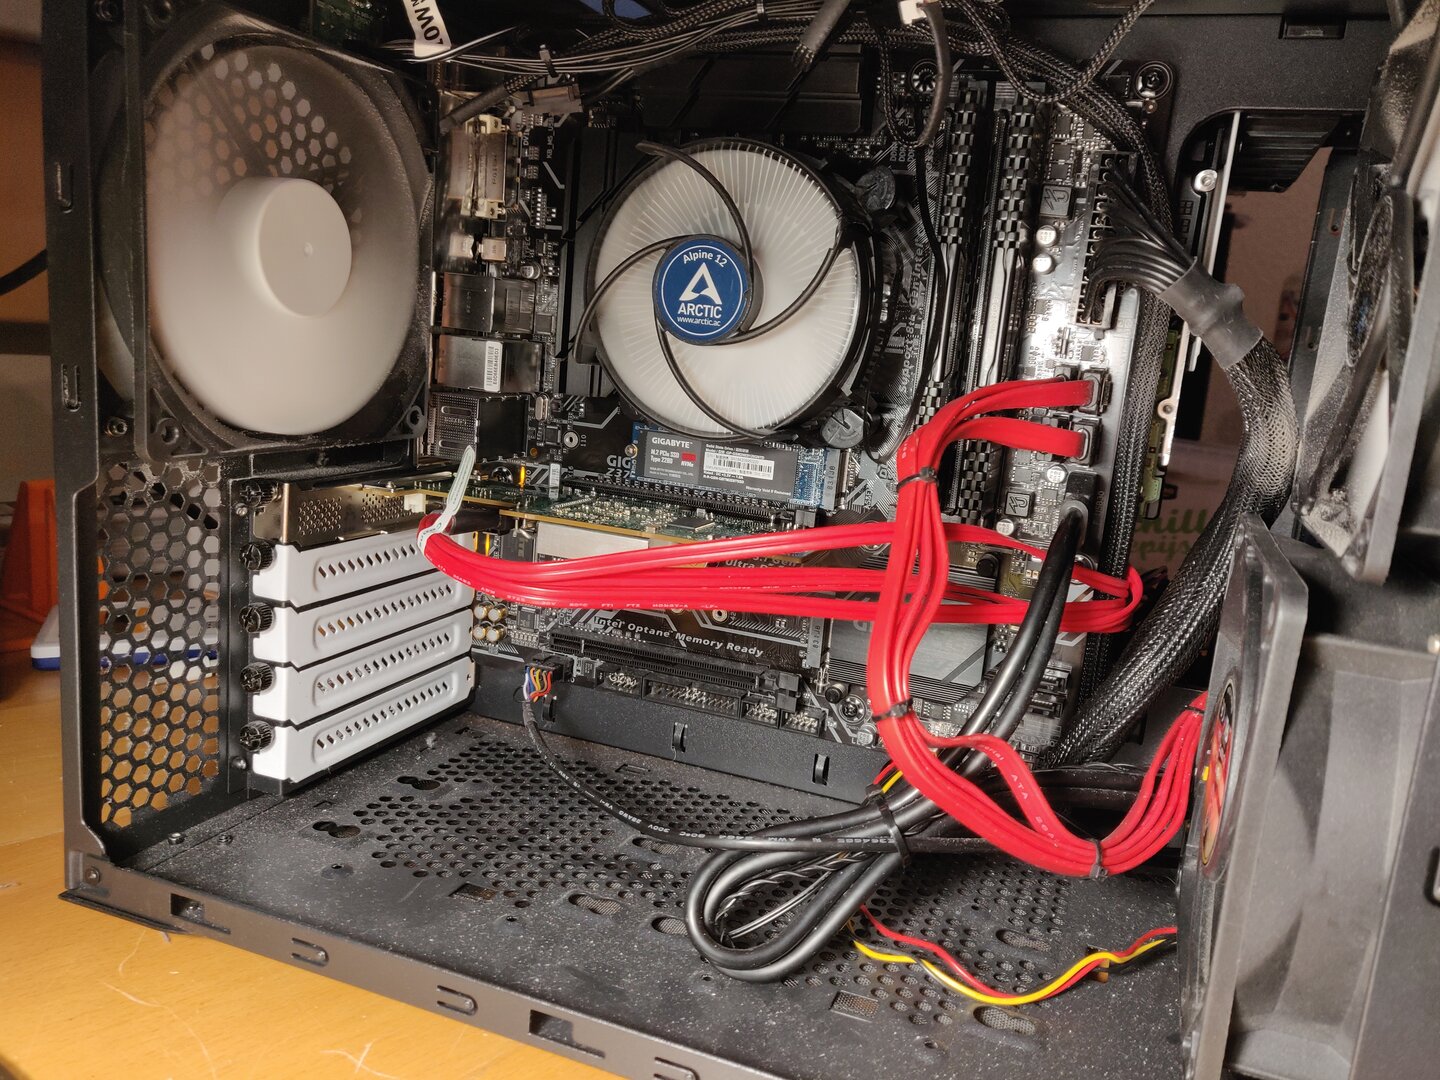
To go with this, I opted for the Gigabyte Z370M D3H motherboard. It’s a decent board in µATX format with 6 SATA ports and 2 NVMe slots. It can accomodate a few expansion cards and has 4 slots for a maximum of 4x 16GB RAM. It also on the osx86 compatibility list, so if I need to, I could run macos on this board.
I wanted decent memory (but without all the RGB madness). I started out with 16GB (single module) Corsair Vengeance (DDR4 2400Mhz).
Many will swear on their mother that you need to have ECC memory when running ZFS. There is a point to be made for the benefits of ECC memory. But this is a pro-sumer system. As Matt Ahren (somewhat head of the OpenZFS project) once wrote:
There’s nothing special about ZFS that requires/encourages the use of ECC RAM more so than any other filesystem. If you use UFS, EXT, NTFS, btrfs, etc without ECC RAM, you are just as much at risk as if you used ZFS without ECC RAM. Actually, ZFS can mitigate this risk to some degree if you enable the unsupported ZFS_DEBUG_MODIFY flag (zfs_flags=0x10). This will checksum the data while at rest in memory, and verify it before writing to disk, thus reducing the window of vulnerability from a memory error.
I would simply say: if you love your data, use ECC RAM. Additionally, use a filesystem that checksums your data, such as ZFS.
I did not get a graphics card for this system.
Enclosure
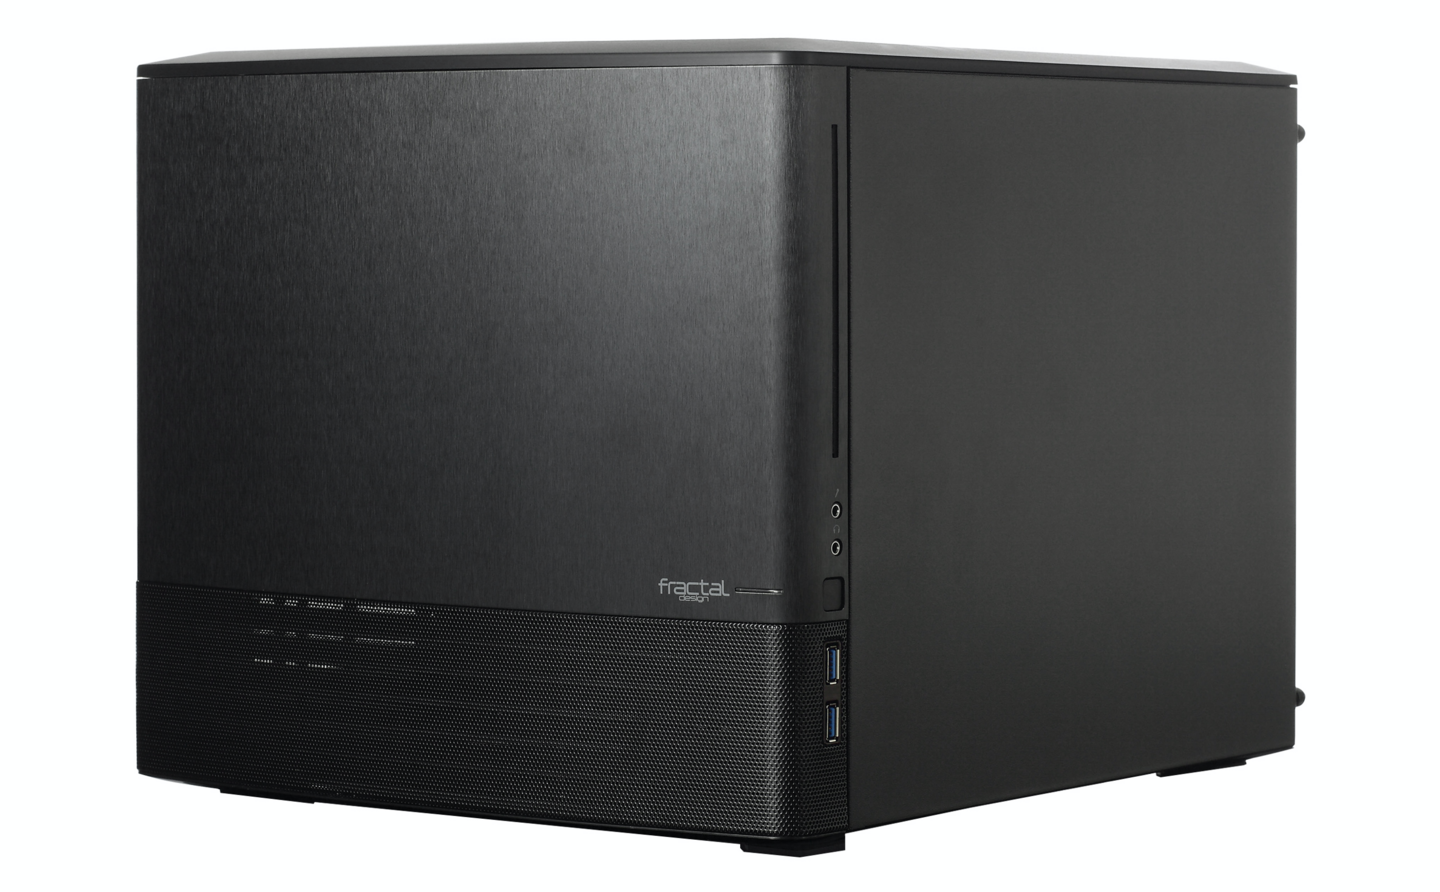
I didn’t want a large 19" rack server. I also had a hard time imagening where I’d put a tall tower system. This led me to investigate some of the more “exotic” enclosures on the market. I was looking for something that could fit 8+ 3.5" drives and a µATX motherboard.
When I found the Fractal Design Node 804 I was sold on it immediately. It’s a beautiful case, fits ten (10!) 3.5" drives, has good cooling options, and it fits perfectly on the bottom shelve of my IKEA Ivar shelving unit.
Disks
I wanted as much storage as possible. But at a reasonable price. I had about 1TB of space in use already, so I would need at least four times that. I found a good deal on four 3TB Western Digital Red drives, which in RaidZ (the ZFS “equivalent” of RAID5) leaves about 9TB of usable space. That seemed plenty.
Updates 1 - Moar Memories!
I quickly realised that 16GB was fine, but since I was running more and more services on this system, and I was looking into running at least a Linux VM to play with Docker, It’d need more memory. An easy upgrade, since I was using only one of the four memory slots.

Update 2 - Moar Spinners!
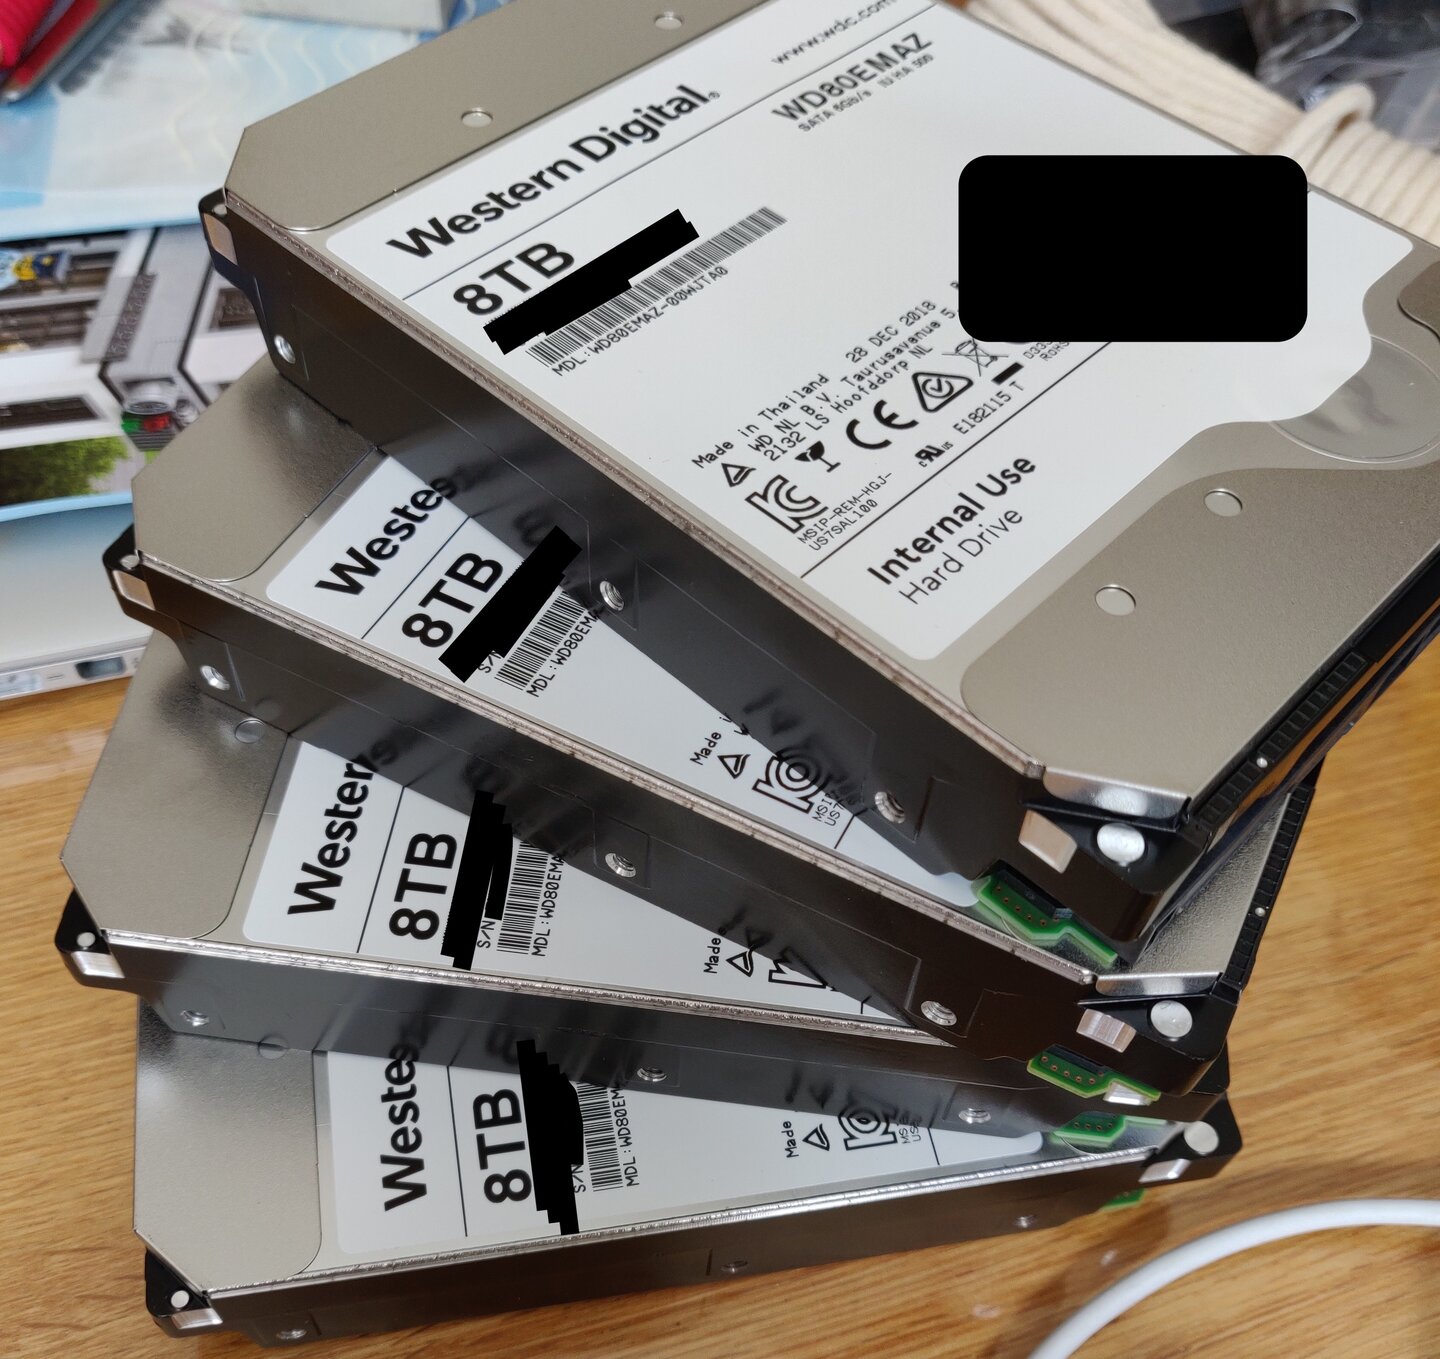
More spinners, rust, disks, drives, whatever your want to call it. As it turns out, once you have 9TB of storage at your disposal, it quickly fills up. This is also around the time I discovered shucking.
It turns out that Red drives are kind of special in how the can deal with vibrations. Their firmware is also optimized to run drives 24/7. The thing is, they are rather expensive.
Now that’s a whopping 44TB Raw storage in a single pool. The pool consists for 2 vdevs, each with 4 drives in RaidZ1. I can lose one drive in each vdev without issue.
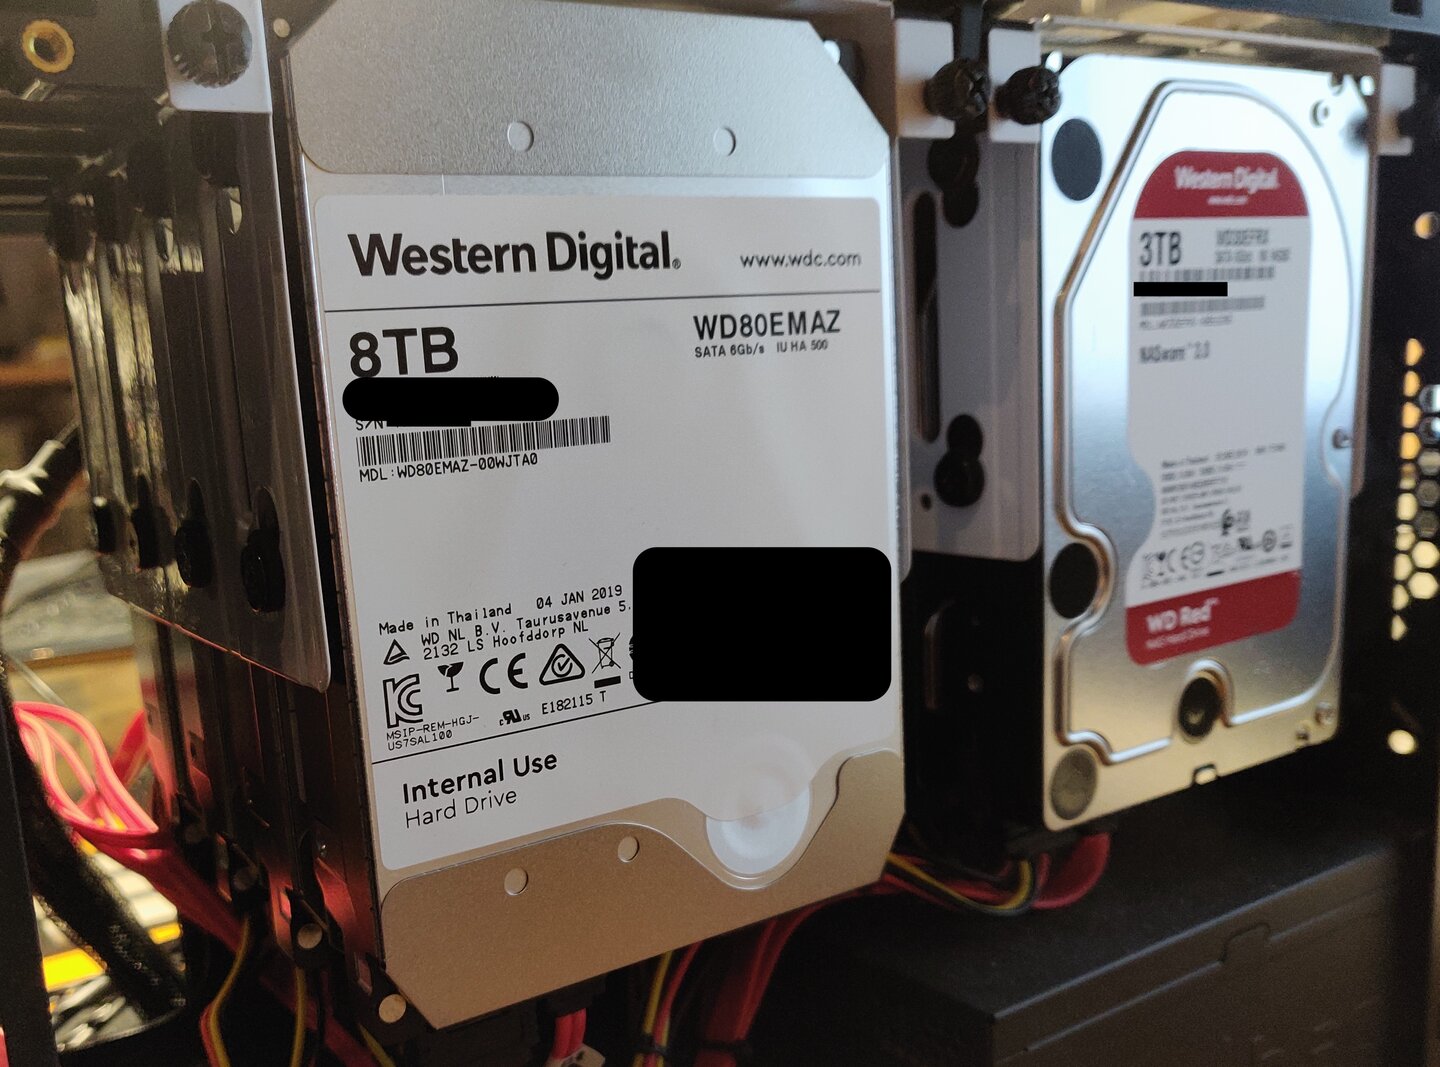
(Sorry, I have to remove identifiable drive data so other can’t abuse them)
The external USB drives (My Book and Essential) are much cheaper, and they often contain “white” drives, which are identical in specs to reds, but for “internal use” by Western Digital. Once the were on sale, it was easy to pick up four of those external drives, remove the disk and put them in the NAS.
For those looking to go the shucking route, keep in mind the following:
- You void your warranty by removing the disks from their enclosure. WD might be lenient when you RMA them, but know what you’re doing.
- Not all models have white drives and some models are known to have many issues (like the 6TB drives from WD). Check out /r/DataHoarder for up to date info.
- Be sure to check the entire disk in its enclosure. You can easily RMA it if you find defects, and you know you’re putting something working into your machine.
- White drives use a newer SATA spec, which re-uses a pin to disable power to the drive. If your system or power supply cannot handle that, the disk will not start-up. This issue can be easily fixed by using a piece of tape.
A real HBA Card
With only six SATA connectors on board, how did I manage to hook up 8 SATA drives? Well, I bought the cheapest SATA controller card I could find on AliExpress. It said it supports four drives, but I could only get it to work with two.
After some research I found a good deal on a use Dell H200 PERC card, which sports the LSI 9211-8i chipset. It has 2 SAS connectors, and when flashed into IT mode, supports 8 SATA drives - and it works flawlessly with FreeNAS.
Only problem is that it needs a bit of external coolingk as the card is used to sitting in a well cooled 19" server.
Yes, I cleaned out the dust, but after running for about 9 months I found the inside rather clean.
Parts list
This is an up-to-date parts list of my current Home Lab NAS / Server
Future upgrades
There are some future upgrades I’m look at.
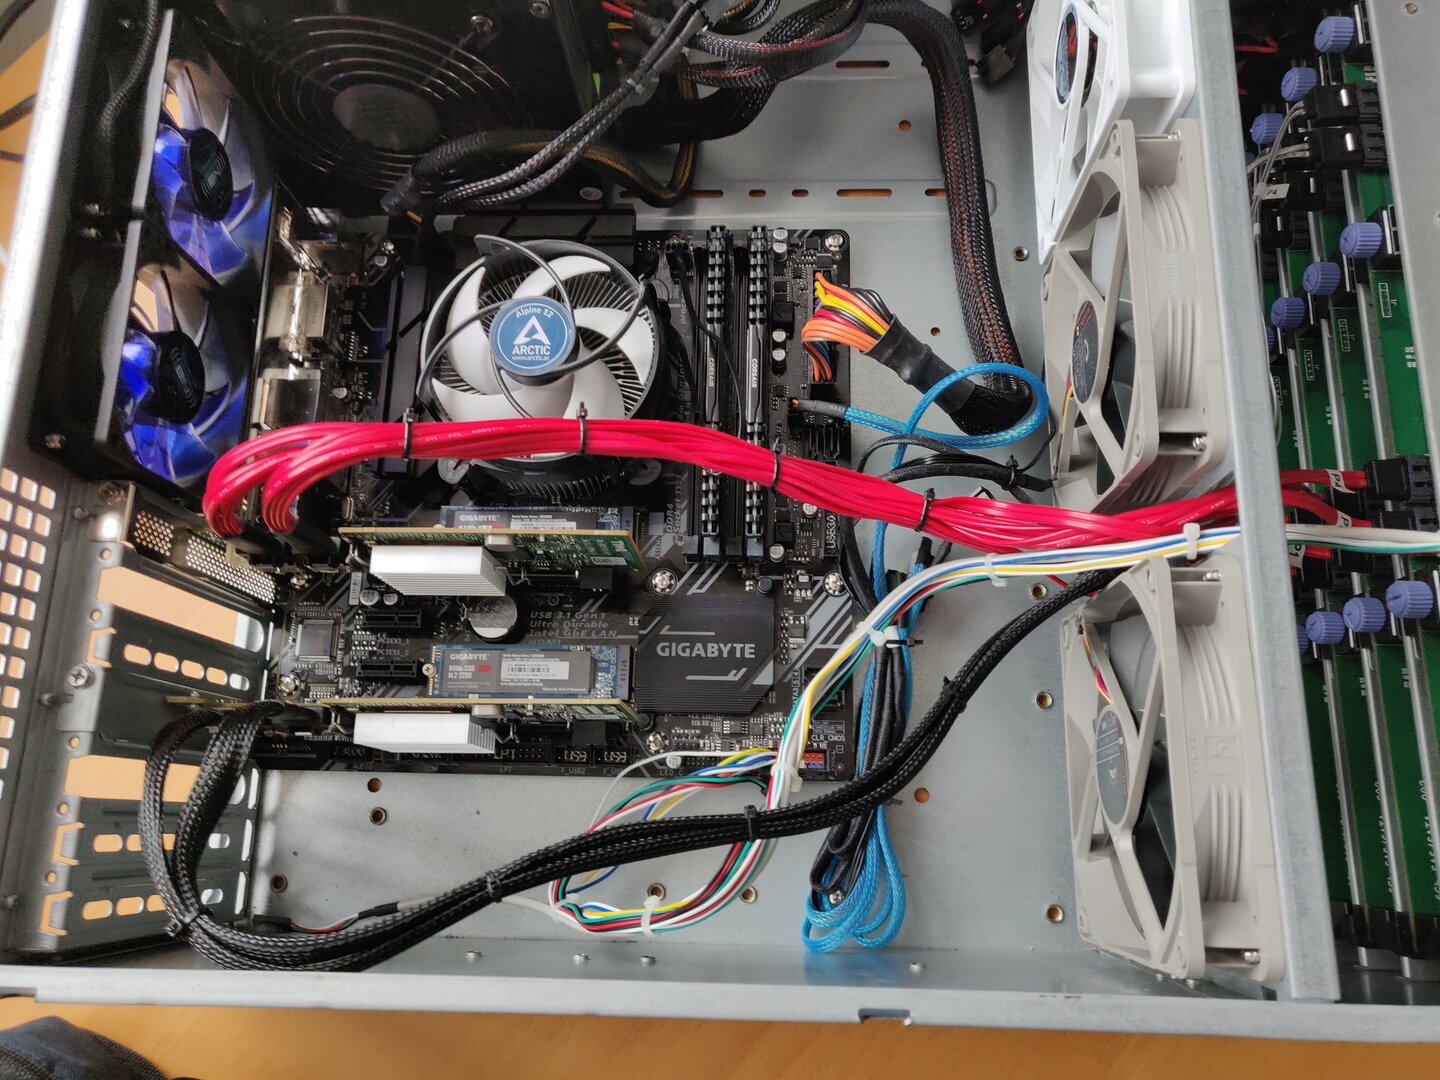
Add four 120mm Nocuta fans at the front to optimize air intake for cooling both the SAS Controller as well as the eight spinners. Still have figure out how to PWM control four fans.I’ve added two front fans on the motherboard side to provide enough airflow for the passively cooled Dell Perc H200. I’ve also added another front fan on the harddisk side (at the top) to increase airflow across all eight HDD’s. Temperatures are much more stable now.- Add an additional mirror of two spinners for a seperate pool, maybe local Borg backups of the most important data.
Add an additional NVMe SSD.My motherboard has two m.2 slots, so I added another (relatively cheap) Gigabyte 128 GB SSD and put that into a ZFS mirror configuration.- Add a mirror of two 2.5" SSDs to run my VM off.
- Upgrade the 3TBs to something better (16TB, anyone?). Heck, upgrade all drives to 16TB for 128TB RAW storage capacity (96TB in the current 2x RaidZ1 setup) Additionally I might opt for a DAS enclosure with 4-8 more HDDs and hook these up through another SAS expander card.
Fill up the RAM slots for a total of 64GB
Want to build a NAS yourself or have any questions? Feel free to drop me a line.
Big August 2020 update
Right, so it’s time to write an update to my NAS project. Quite a few things have changed, so gear up!
The image above shows it already; I changed enclosures. But why? Let me start by saying that the Fractal Design Node 804 is an amazing case, but it has three drawbacks.
- The airflow, even with 3 fans blowing across the hard disks, was not enough to keep the disks cool. Especially the 8TB Reds would easily reach over 50°C (~122°F) on hot days. That’s probably not something to worry about, but better safe than sorry.
- The HDDs are not really easily accessible. Now I didn’t have any issues with disks yet, but with the amount of cable clutter and caddies with four drives each, it’s not trivial to replace a disk. This becomes more important now as failures are more likely to start happening and I’m still looking to upgrade the 3TB Reds sometime.
- It can only hold 8 disks. Well, that’s not really a fault of this case.
So, what’s a reasonable upgrade for a Node 804 that makes disks easily accessible, accommodates more drives and can be fit under my desk. I could have gone with a Fractal Design Define 7 XL, which can house up to 18 HDDs, but it’s quite expensive at over €220. It also did not really make the drives any more accessible.
I soon ended up with a 19" rack mount form factor. I saw a few deals on cheap Dell machines with 8 or 12 bays and decent Xeon-based hardware. I passed on those, mainly because these things are power hogs and really LOUD. Besides, I already have all the hardware I need, I just want another case.
There are a few manufacturers out there that sell 19" rack mount storage chassis. The 2U versions house up to 8 HDD’s, which would be fine. But, if I’m going to invest in a new case, I want that little bit of extra room to expand in the future. This soon leads to 4U cases, which have 10, 16, 24 or even more HDD bays. The problem is, at this time, they’re really hard to find, especially if you want to stick consumer ATX hardware into them. Also, they are almost all sold out. And if you manage to find one, they’re not cheap either at over €500. Such is life in Europe, I guess.
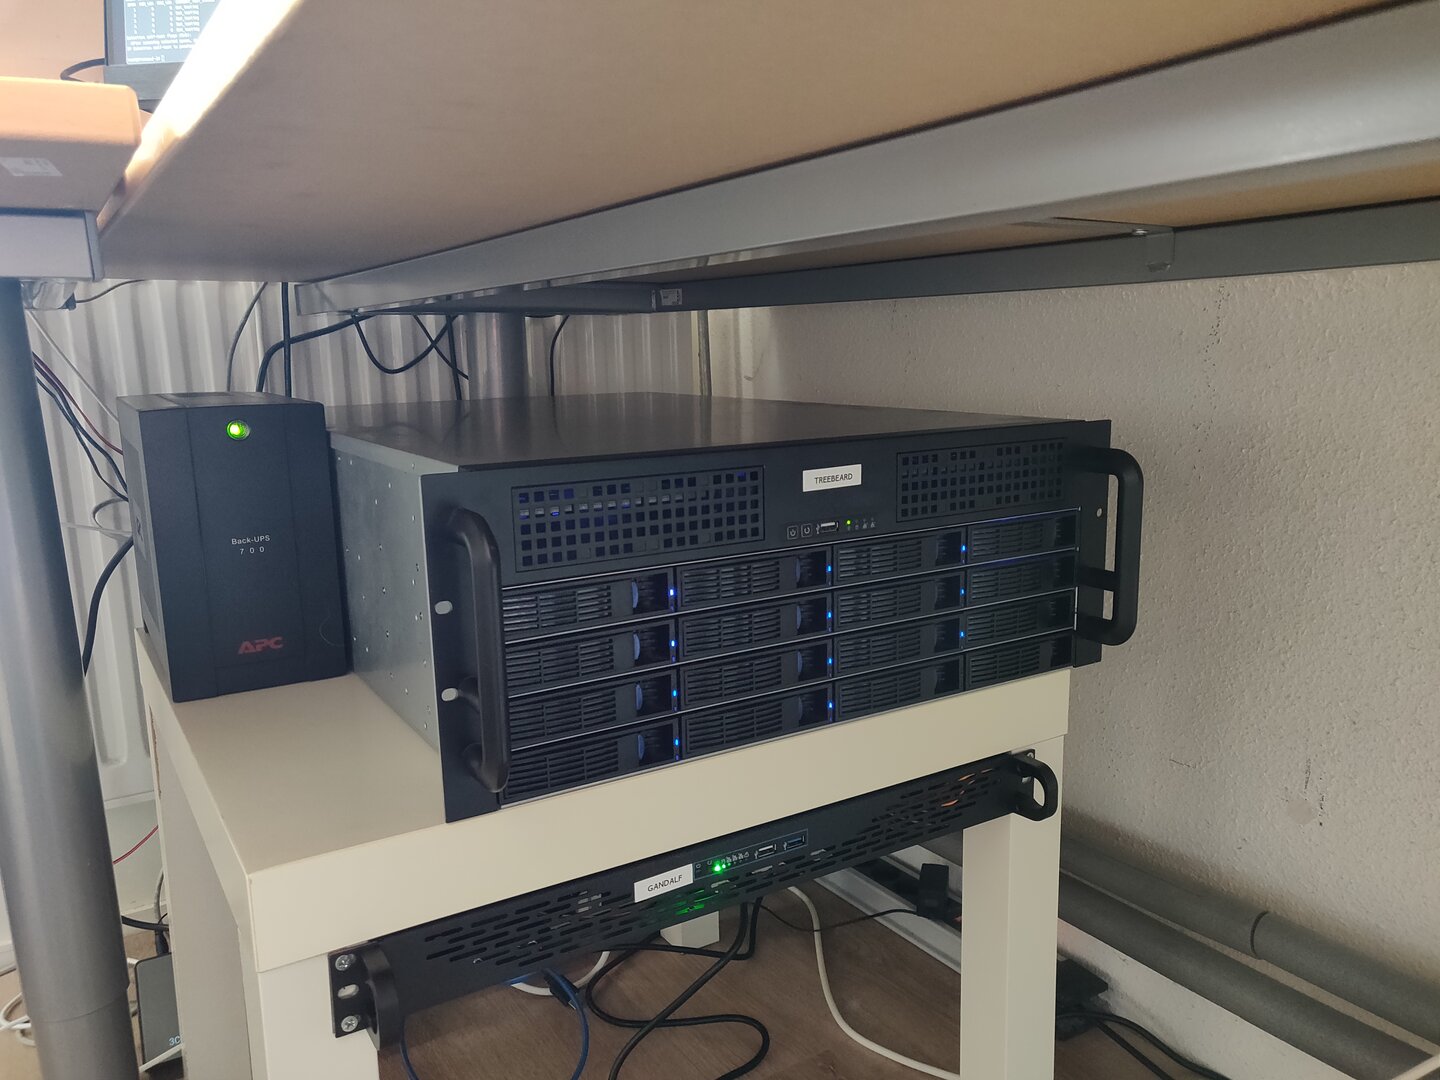
Luckily, while browsing the classified ads section of Tweakers.net I came across a nice fellow who was selling his old Norcotek 4U 16 bay chassis. I informed about the price and we ma deal for €75. The only problem was, he lived at the other side of the country. And you simply don’t ship a 4U server easily or cheaply.
So, I took a day off work and drove over 3 hours to pick up my new NAS enclosure.

When I went to pick up the case, it turned out it came with a 520W power supply (already neatly cable managed), four Mini-SAS 8087 to 4x SATA cables and all the original screws in their originally labele bags. Bonus are nice scythe case fanse. Wow!
Installation was pretty straight forward, simply move everything to the new case. My single Dell PERC H200 card could accommodate 8 of the 16 hot swappable caddies. So I would need another one of those to handle the other 8. That would free up my motherboard SATA connectors for additional, internal SSDs and what not. Luckily, I could buy another one pre-flashed from a local ebay seller.
Enter Proxmox
Another item on my list was to move to Proxmox and virtualize FreeNAS. Let me explain why I want to do this.
First, FreeNAS / TrueNAS is a great system. FreeBSD is rock solid and ZFS offers an amazing “storage experience”. The only
thing lacking is virtualization support. FreeBSD jails work fine, but I had some recent trouble with iocage commands being
terribly slow, and I often struggle to convert linux install instructions to their FreeBSD equivalents. Updating jails
has also proven to be a painful process for me. The solution was to run a virtual machine (with a fixed amount of RAM) and
run docker on it. It all worked, but it didn’t feel solid. Also, I didn’t hear many great things about bhyve, although I
haven’t gotten into any real trouble.
Well, enter Proxmox. Proxmox is a custom debian linux os that offers qemu virtual machines and LXC / Linux Containers. That sounds really awesome. With Proxmox it’s also possible to pass through PCI devices to a virtual machine. This means that I can map both my HBA cards to my FreeNAS virtual machine and run FreeNAS just as before.
The process was quite painless: backup my FreeNAS configuration, install Proxmox, create a VM for FreeNAS, and install it. Then restore your configuration (maybe make a few tweaks for changed device names, like your NIC, or scheduled SMART tasks), and you continue where you left off. It works really great.
I’ve migrated most of my jailed / dockerized services over to linux containers based on Debian. Some more complex ones, like Gitea and Plex are still where they were (a docker VM and FreeNAS jail, respectively).
For fun an giggles I added three old 500GB spinners to create a new ZFS pool with to try things out, like replacing disks, etc.
More RAM
All the while, the original Corsair Vengeance LPX 16 GB (1 x 16 GB) DDR4-2400 Memory were on sale at Amazon.de, so I decided to scoop up a few and extend my NAS’ memory to 64GB total. 24GB of this RAM has now been allocated to FreeNAS, which uses about half of that for services, the rest is used for ZFS cache.
So what about those disk temperatures?
My eight spinners are all located on the left side of the chassis right now, so they’re packed tight. But with the recent heat wave in the Netherlands with ambient temperatures rising to 32°C, no disk went above 44°C, which is a big win if you ask me.
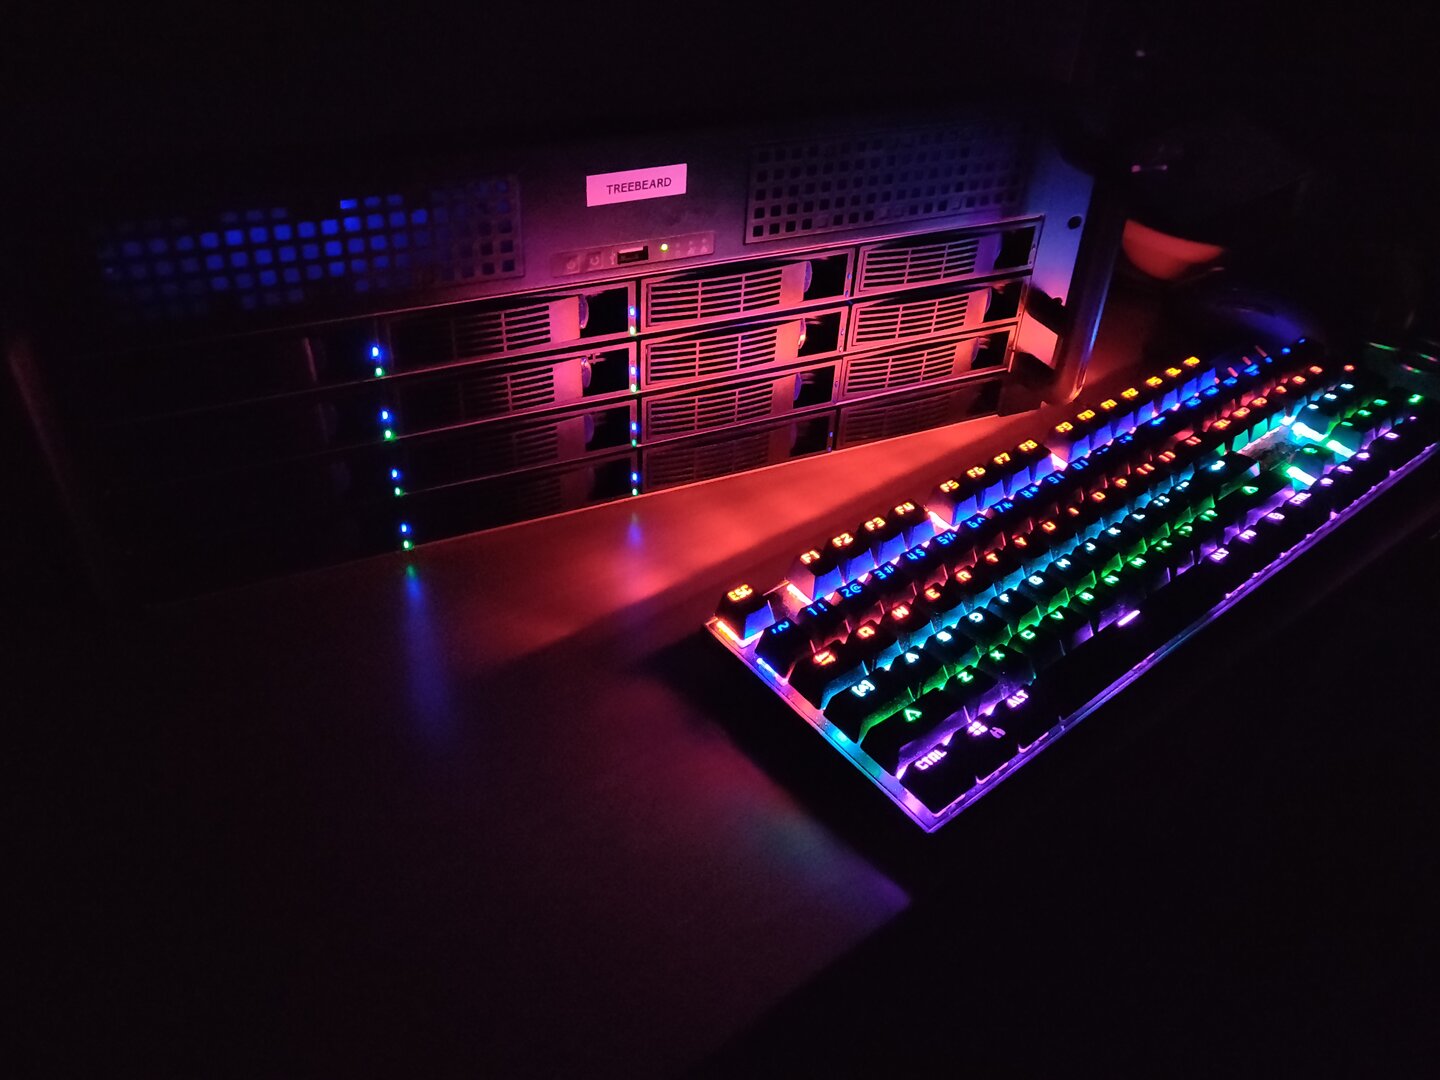
Treebeard and Gandalf
treebeard and gandalf in my Lack Rack.
My NAS has the official hostname of treebeard. I also setup gandalf, a 1U 19" rack mount server with a simple ASRock mini-ITX
board an i3 4130T processor. It’s fitted with 2x 128GB SSDs locally. gandalf also runs Proxmox. In fact, they form a cluster of two. This makes it super easy to migrate
services between the two nodes. gandalf runs some essential home network services (all in Linux Containers), like pihole, wireguard,
and home automation.
Update: gandalf was using over 150W of power while idle. It was also running quite hot, even though I upgrade the three 40x40mm
fans with Noctua ones. For now, gandalf has been retired and removed from the cluster until I can figure out what’s causing this
insane power consumption. For comparison, treebeard with its 11 spinners, is running at about 100W idle.
APC UPS woos
A year ago I purchased an APC Back-UPS 700. It’s been working great so far. However, after disconnecting it from the old server, and hooking it up again to the new one, I noticed that the USB connection would no longer work. Just nothing. I found out I needed to reset the UPS by powering it off, disconnecting the battery (with the large yellow plug on the back) and turn it back on again.
As that worked to get USB working again, it did yield some strange values in apcaccess, namely that the status was not ONLINE,
but BOOST and that it was not reporting some critical values, like TIMELEFT. After a quick call to tech support I had to
perform a battery callibration. Basically: you disconnect your load and instead hook up something that burns power, like an old
light bulb or an electric heater. You then disconnect mains power and run the battery dry (this is safe, as the UPS will shutdown
before you can damange your battery). Then, without any load, reconnect mains and let the unit charge fully.
After this the UPS was working great again.
Recently I read about how this budget line of UPS devices does not work well with no battery connection. E.g. if you disconnect the battery, your load will be disconnected from power, even if you have mains power connected. Read more at Fitzcarraldo’s blog post about his UPS experiences.
September 2020 update
This is starting to turn in a blog-in-a-blog kind of thing. But here’s another update for you.
More APC UPS woos
The reset I performed worked for a few days. Then, in the middle of the night:
STATUS : ONLINE REPLACEBATT
Of course, this happened in the middle of the night, accompanied by a loud beeping tone from the UPS. I purchased a replacement battery online (same model / ratings, just not the expensive, APC branded one). This fixed the problem and the UPS has been working as it should. Still very strange that the battery gave out after just one year of usage.
No more FreeNAS!
This may come as a shocker ;-) I dropped FreeNAS. As you may remember I started running FreeNAS in a VM on Proxmox with the HBA card passed through to FreeNAS. In order to share my pool/datasets with other VMs / containers in Proxmox, I needed to share them over NFS to the host system, which would then require my containers to run in priviledged mode to mount the NFS shares. The real issue was performance, many apps had issues with locking to the NFS mounts. Downloading large files would sometimes throw errors. It was not fun.
But then I thought, what am I really still using FreeNAS for? I don’t like the jails - they’re FreeBSD and I prefer linux. I have an NFS share - but only because I need to share with the host. Maybe a Samba share for time machine, but that’s really all. Well, and for ZFS of course.
But Proxmox support ZFS as well! A small container can run Samba for Time Machine backups. So, I took the plunge:
- Shut down the FreeNAS Vm
- Disable auto-start :-)
zfs import core-storage tank- importing and renaming the pool in one go
That. Was. It.
Moar drives!
My chassis can house 16 3.5" HDDs in hot-swap caddies. I ordered a second Dell PERC H200 HBA card from eBay. I now have the following drives in my pool:
- 4x Western Digital 3TB Red
- 4x Western Digital 8TB White (shucked from WD Elements)
- 4x Western Digital 14TB White (shucked from WD Elements)
Yes, you read that right. Amazon.de had the 14TB WD Elements on sale, so I grabbed four of them. My pool now consists of three RAIDZ1 vdevs:
# zpool status -v tank
  pool: tank
 state: ONLINE
  scan: scrub repaired 0B in 0 days 20:08:21 with 0 errors on Thu Sep 17 05:25:13 2020
config:

	NAME        STATE     READ WRITE CKSUM
	tank        ONLINE       0     0     0
	  raidz1-0  ONLINE       0     0     0
	    sdc     ONLINE       0     0     0
	    sdb     ONLINE       0     0     0
	    sdg     ONLINE       0     0     0
	    sde     ONLINE       0     0     0
	  raidz1-1  ONLINE       0     0     0
	    sdd     ONLINE       0     0     0
	    sdf     ONLINE       0     0     0
	    sdh     ONLINE       0     0     0
	    sda     ONLINE       0     0     0
	  raidz1-2  ONLINE       0     0     0
	    sdi     ONLINE       0     0     0
	    sdj     ONLINE       0     0     0
	    sdl     ONLINE       0     0     0
	    sdm     ONLINE       0     0     0
And some specifics:
# zpool list tank
NAME   SIZE  ALLOC   FREE  CKPOINT  EXPANDSZ   FRAG    CAP  DEDUP    HEALTH  ALTROOT
tank  90.8T  35.2T  55.6T        -         -     9%    38%  1.00x    ONLINE  -
That should be sufficient for a while, but don’t quote me on that. :-)
Smart UDMA CRC Errors
For a bit /dev/sdi had some UDMA CRC errors. These are, especially with new drives, often caused by cable issues.
I offlined the drive, stuck in one of the four remaining free slots, and the problem was solved. ZFS of course had
picked up on this as well and Proxmox immediately nofitified me of the SMART and ZFS issues by email. Yay for Proxmox!
ID# ATTRIBUTE_NAME          FLAG     VALUE WORST THRESH TYPE      UPDATED  WHEN_FAILED RAW_VALUE
199 UDMA_CRC_Error_Count    0x000a   100   100   000    Old_age   Always       -       16
Resetting the ZFS pool status is easy with zfs clear tank. For good measure I ordered a scrub, which finished without
any further issue.
Next steps?
Nothing right now. I have several TB’s of storage left to hoard. CPU-wise I’m good. Memory is all max’ed out. I love Proxmox for being Linux and supporting ZFS.
One more thing…
Yeah, I know what I said last time I updated this post. I upgraded my motherboard/CPU/Memory even further.
Read more in my latest post on my NAS: https://www.devroom.io/2020/11/12/the-big-diy-nas-update